
Labeling Video assets
Kili supports all the major video formats and a wide variety of respective codecs. Though we recommend labeling videos imported as native videos, in case of some of the formats, you might have to import your video as separate frames. For more information on the limitations, refer to Adding video assets.
Labeling Video projects
In your Video projects, you can add these job types.
In object detection jobs added to Video projects, you can use these tools:
- Bounding box
- Point
- Polygon
- Semantic segmentation (including Interactive Segmentation with SAM 2)
- Line
Some of these tools have a limited feature set. For more information, refer to the subsequent sections.
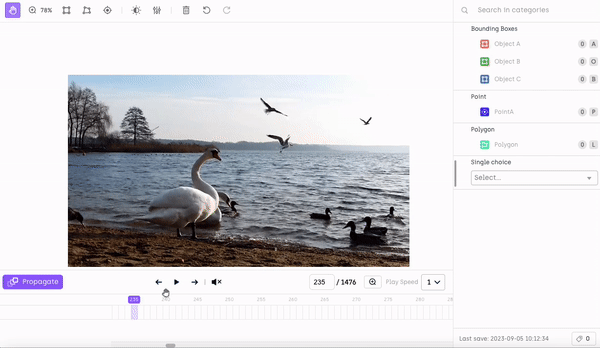
Kili's Video interface was designed with focus on readability and ease of use. Kili's video timeline and jobs viewer are designed to clearly show all the annotations that were added and allow easy access to them. You can use the standard set of video controls to:
- Move back and forth between your video frames
- Type a frame number and then jump to a specific frame
- Play the video starting with the frame you’re currently on
- Mute the video
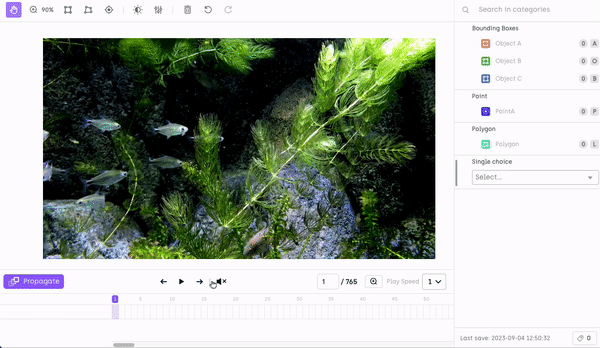
Using video controls to navigate video frames
Additionally, you can use Kili's predefined keyboard shortcuts to navigate between frames. For example, you can jump 10 frames forwards and backwards as well as move to the first and last frames of your video. For a full list of options, open your shortcuts menu.
Depending on your ontology and project needs, the recommended labeling techniques might be different (refer to Best practices for labeling). Kili's video interface offers many additional video-specific features and workflows to easily process the labels that were added. For example, after adding an annotation, you can extend it to other frames, adjust it on specific frames, or remove it from other frames.
At any point during the labeling process, you can adjust your environment using the standard UI settings and Kili's dedicated Video controls.
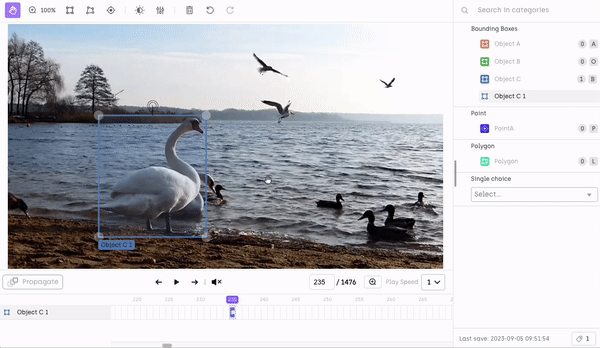
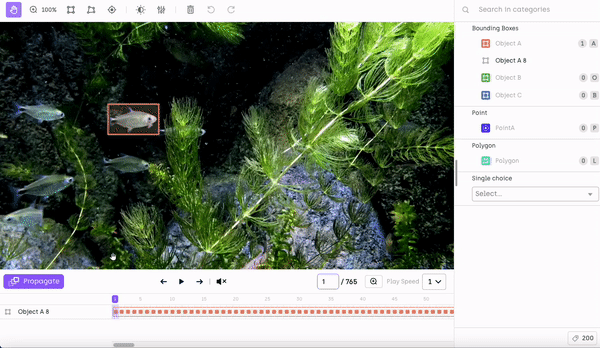
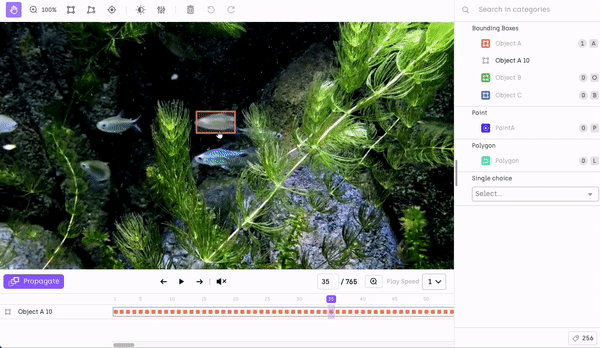
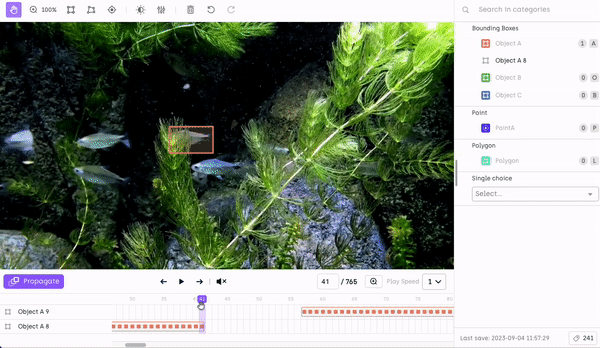
Extending your annotation to other frames
You can easily extend an existing annotation to more frames. You can do that either by dragging the existing annotation across more frames:

Manually extending an existing annotation
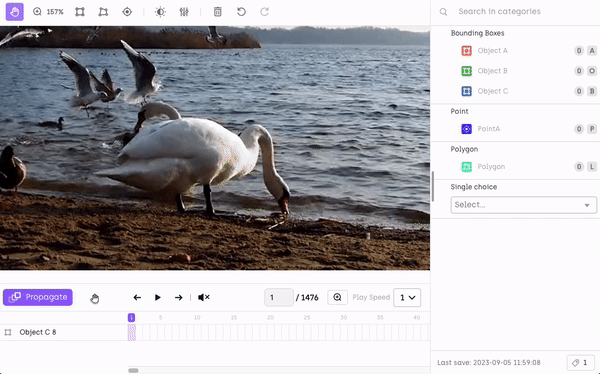
or (for example in cases when you need to quickly propagate the existing annotation till the end of your video), use Kili’s Propagate to this frame feature:
Propagating an annotation to a specific frame
Note that you can always shrink your annotation span, too.
Automatically extending your annotation
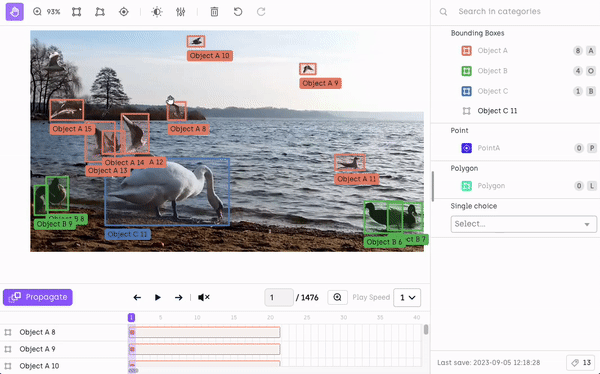
If you want to save yourself some of the manual work, you can use Kili’s Smart tracking feature. Simply select a labeled object, then select Smart tracking from its context menu, and have Kili’s backend automatically label the object on all the remaining frames.
Automatically tracking an object across many frames
- Currently, Smart tracking only works with the Bounding box tool.* Depending on what’s easier for you, you can activate Smart tracking from the asset viewer or straight from your video’s timeline.* Note that smart tracking will only process all the remaining frames in the absence of any key frames. If key frames exist, smart tracking will stop at the next key frame that it finds.
Adjusting your annotation on specific frames
For standard label adjustments, refer to Changing and updating labels.
When you make an adjustment on a specific frame, you create a key frame: a crucial reference point with your object's location and attributes. This information is then used to track the object across the video's remaining frames. Location of any of the objects located in between key frames is inferred by the video labeling engine (automatic interpolation). Key frames are quite significant, as their presence or absence often determines how certain features behave.
Automatic label interpolation
- Note that in Kili’s UI, key frames are marked with a square.
- Automatic interpolation works only with bounding boxes and points.
Interpolation works well on linear animations but does poorly on more erratic motions so there will be cases where your moving objects quickly move out of focus. To save you a lot of time and alleviate some of the burden resulting from manual rework, you can use Kili’s Smart tracking feature.
SAM 2 for Video Segmentation (Beta)
With SAM 2, you can now create precise segmentation masks on video frames and automatically track your target across multiple frames with Smart Tracking. Here’s how to use SAM 2 effectively in the video interface:
Getting Started
- Select a Frame: Open the video in the labeling interface and navigate to the frame where you'd like to begin segmentation.
- Choose the Interactive Segmentation Tool: Use the Bounding Box tool from the toolbar to create an initial segmentation mask. You can choose between two SAM2 models based on your needs:
- Rapid: Offers faster results with a slight trade-off in accuracy.
- High-Res: Prioritizes accuracy with a bit more processing time.
Using Smart Tracking
Once your initial segmentation mask is set, activate Smart Tracking to automatically track and segment the target across the next 50 frames:
- Stopping Tracking: You can stop tracking at any point by pressing
ESC. - Automatic Stopping: If SAM 2 loses the target in subsequent frames, tracking will automatically stop, and the object will be removed from any frames where it is no longer detected.
Current limitationsSince segmentation masks generate a large volume of data, we recommend using tracking on a single target per session for optimal performance.
This feature is currently in Beta, and we are working to enhance scalability for even more efficient tracking. Stay tuned for updates!
Removing your annotations
If you want to remove your annotation entirely, you can do that directly from the asset viewer, from the job viewer, from the timeline, or by applying a keyboard shortcut. It all depends on your specific use case and preferences.
Removing an annotation from all the frames
Note that if you want to remove an item from all the frames, you must use the bin icon accessible from the timeline, to the left of your annotation.
If you want to remove an annotation form specific frames, for example if the Smart tracking mechanism lost track of your object at some point, locate the problematic frames, then right-click them, and select Cut from this frame to remove the annotation from all the consecutive frames.
Removing an annotation from specific frames
If our object disappeared only from certain frames, you can use Kili’s Delete selection feature.
Deleting an annotation from a set of frames
If the object re-appears on your video but is labeled as a different item (for example, in cases when you used an ML model to pre-annotate), you can use the Group feature to make sure you have one, instead of multiple objects on your timeline.
Creating one annotation from two annotations
If the object corresponds to two separate objects, you can use the Split feature. This will create a new object without losing the annotation work already done.

Adjusting your work environment with dedicated video controls
You can adjust the amount of frames visible in the timeline. If you want a general overview, you can “zoom out”, but if you need to adjust specific annotations on very specific frames, you can “zoom in” to see just a handful of frames in the same timeline and conveniently handle them as separate entities.
Adjusting the number of frames visible in the timeline
By default, your annotations are propagated to the next 100 frames. You can increase and decrease this number, or even switch off the propagation completely, if you prefer to address your frames one by one.
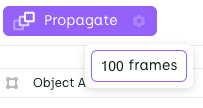
Changing the propagation settings
Automatic propagation of labels
Updated 5 months ago