
Importing labels
You can import existing labels into a project so that annotators start from pre-annotated assets instead of a blank canvas. They only need to validate the pre-annotations, correct them where needed, and complete the labeling.
Imported labels can be:
- Predictions from a custom, in-house model
- Predictions from a weak supervision framework, such as Snorkel
- Human-labeled data from previous projects or other sources, for example to review or re-annotate an external dataset
You can also import ground truth labels to run quality checks on your annotators' work. For details, refer to Honeypot overview.
Importing predictions from the Kili app
Only project admins can import predictions.
Supported formats
| Project type | Supported formats |
|---|---|
| Image | COCO, YOLO, Kili |
| Kili | |
| Text | Kili |
For other project types, such as Video, Audio, or Geospatial, import labels programmatically.
For details on each format, refer to Kili data format and YOLO formats.
Step 1: Upload your files
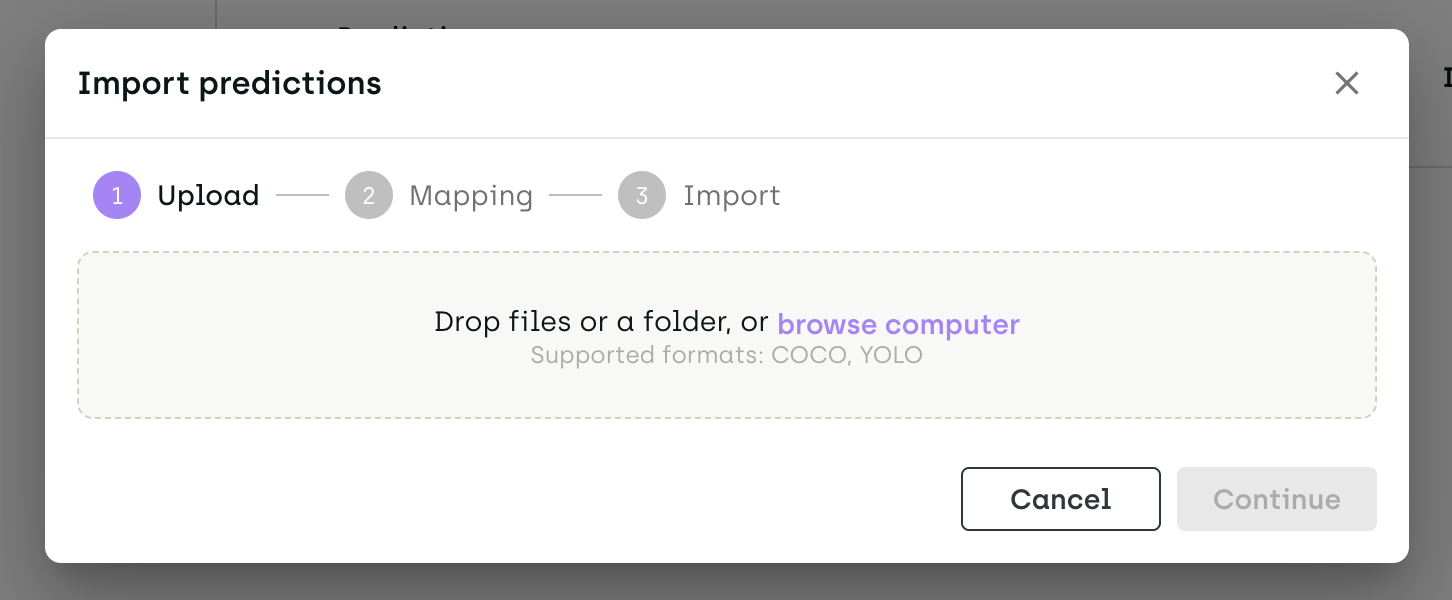
- From the project Settings page, open Imports.
- In the Import page card, click Predictions.
- Drag and drop your files or a folder, or click browse computer.
- Check the detected format. If it's incorrect, select the right one from the dropdown.
- Click Continue.
Kili matches each prediction to an asset using the asset's external ID [TO CONFIRM: which field carries it in each format, e.g. YOLO label file name, COCO file_name]. Predictions that don't match any asset in the project are not imported. If none of the predictions match an asset, you can't continue to the next step.
Step 2: Map classes to categories
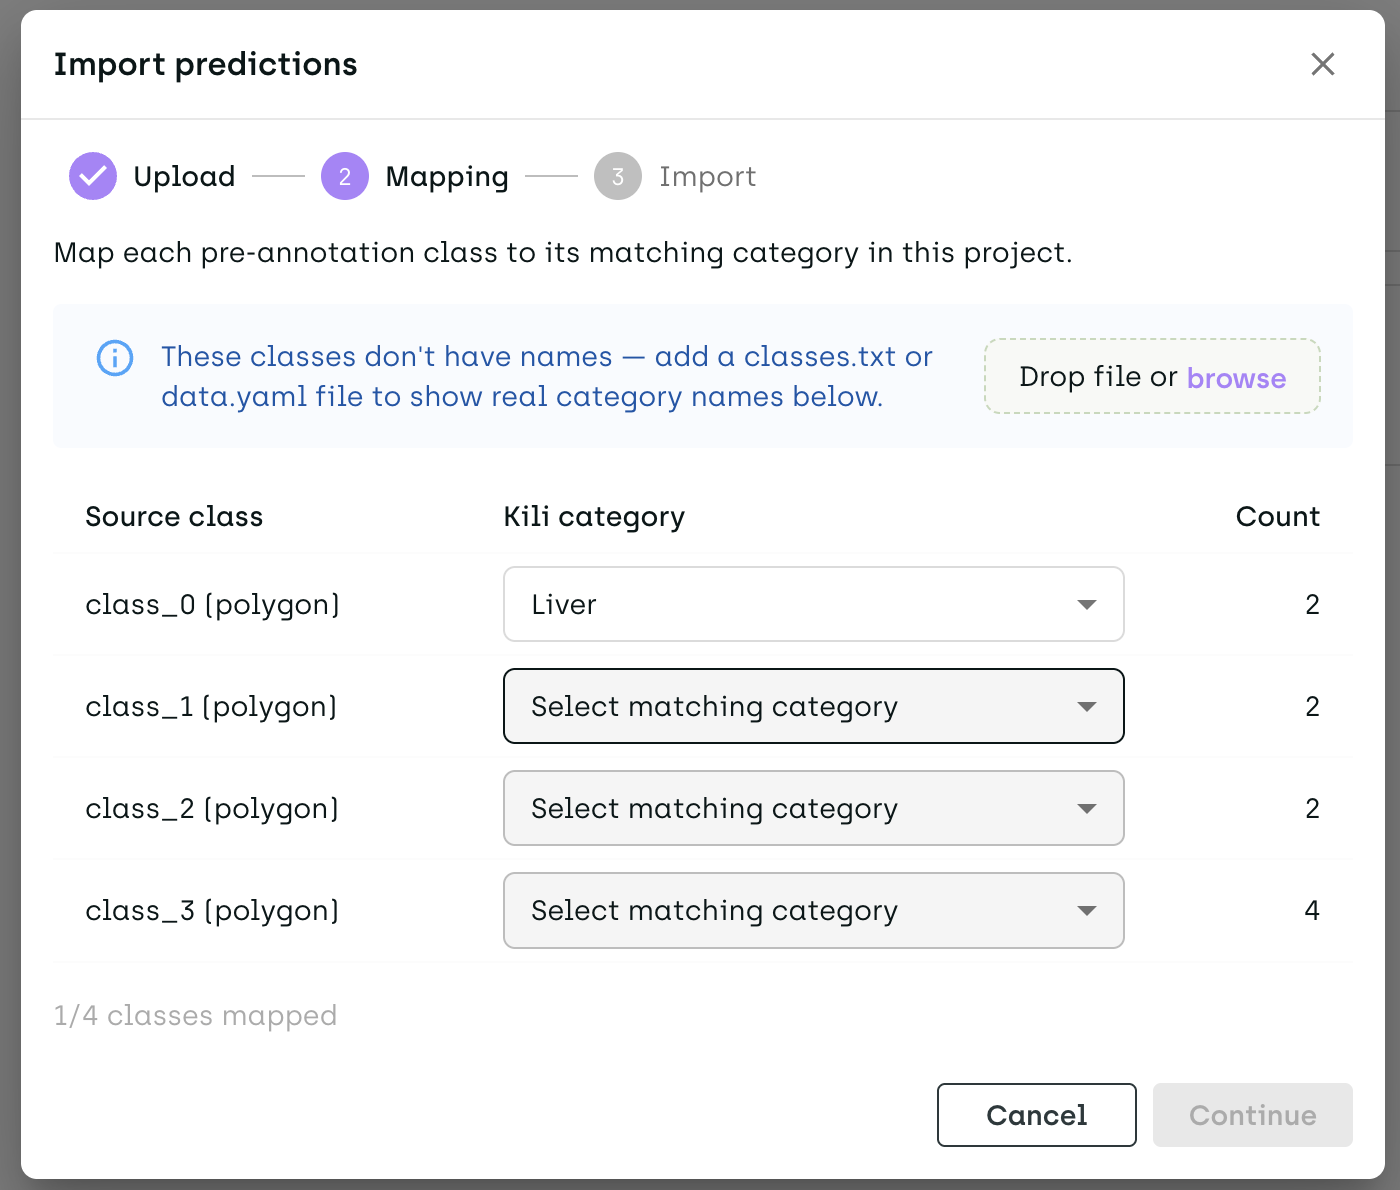
Kili lists the classes found in your files, with the number of annotations for each one. Classes whose names match a project category are mapped automatically.
For every other class, select the matching category from the Select matching category dropdown. The counter below the table shows how many classes are mapped.
If your files contain class indexes instead of class names (for example, YOLO files without a class list), add a
classes.txtordata.yamlfile in the drop zone that appears. Kili then displays the actual class names.
If your project has no category for some of the annotation types in your files (for example, bounding boxes or polygons), Kili lists the missing types and you can't continue. Add matching categories to your project ontology, then start the import again. For details, refer to Customizing project interface.
Step 3: Import the predictions
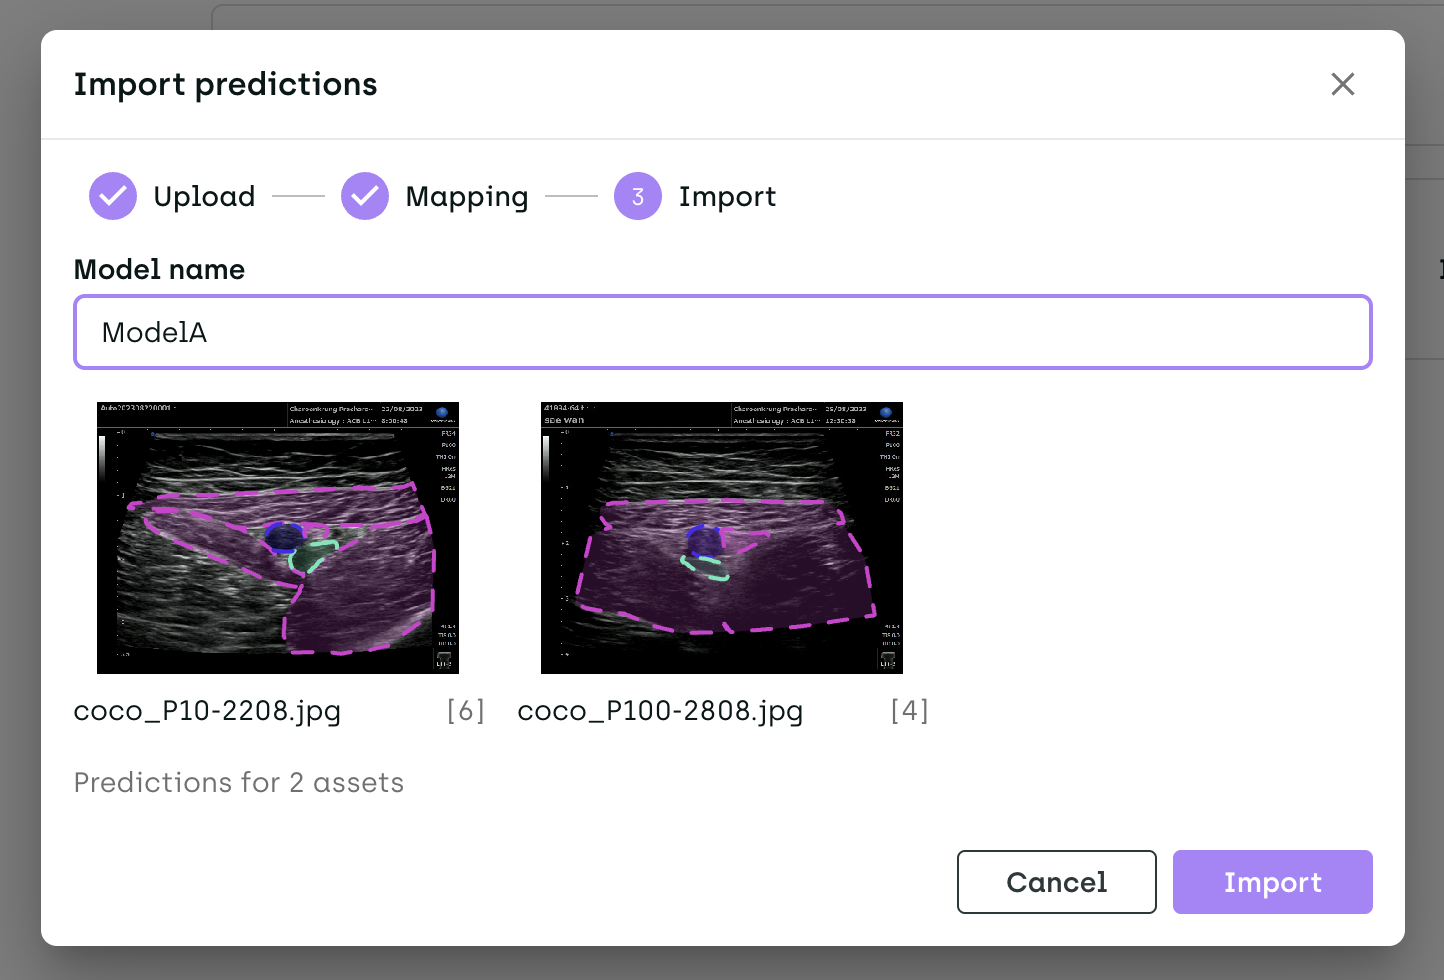
- In Model name, enter the name of the model that produced the predictions.
- Check the preview (Image projects only) of the assets that will receive predictions.
- Click Import.
Imported predictions are tagged with the model name, so you can filter assets by model in the Queue. If an asset already has predictions, the new predictions are added alongside them, even if they come from the same model.
Importing labels programmatically
You can import labels with the Kili Python SDK. For an end-to-end example, refer to our tutorial on importing labels.
For details on the required structure of imported labels, refer to Kili data format.
To tag predictions with their source model, fill in the modelName field. You can then filter assets by model in the Queue.
How predictions are displayed
The
labelVersionof each annotation in the label'sjsonResponsedetermines how it's displayed in the labeling interface:
labelVersion = "prediction": the annotation has a dashed outline, indicating a prediction.labelVersion = "default": the annotation has a solid outline, indicating a manually created or edited annotation.If
labelVersionisn't defined at the annotation level, the interface uses the label'slabelType:
labelType = "PREDICTION": dashed outline.labelType = "DEFAULT","AUTOSAVE"or"REVIEW": solid outline.When an annotation is modified, its
labelVersionis automatically set to"default".
Updated 9 days ago