
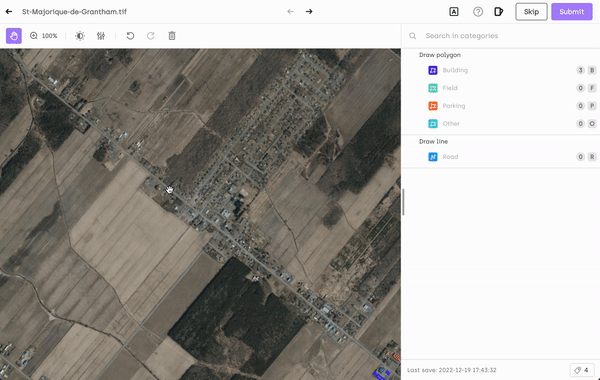
Labeling Geospatial imagery
New Geospatial Projects Now Available (Beta)Kili is evolving! While this page reflects the legacy support for geospatial data through standard image projects, we are now rolling out dedicated Geospatial Projects with expanded capabilities—including native multispectral support, shapefile import, dynamic tiling, and more.
These new projects are currently available in beta upon request. We encourage you to contact our team to request early access and start benefiting from a geospatial experience built for scale and precision.
👉 For more details, check out our Labeling Geospatial assets (Beta 🚀) page.
Introduction
Geospatial imagery annotation involves working with specialized image data captured from satellite, aerial, or drone sources. These images differ significantly from standard photographs in several ways, requiring tailored approaches and tools for effective labeling. Below are some key specificities of geospatial imagery:
- High Resolution and Large File Sizes
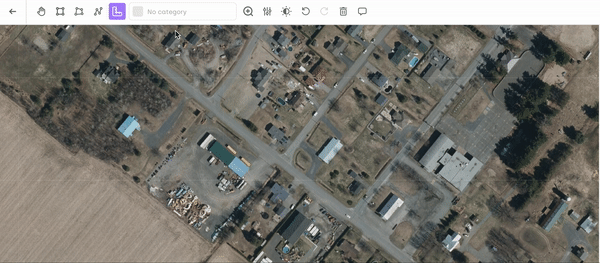
Geospatial images are typically extremely large, with high ground resolutions where each pixel corresponds to a specific area of the Earth's surface. These files can be hundreds of megabytes or more in size, making smooth loading, navigation, and zooming capabilities essential for annotators.
- Geo-coordinates Metadata
Unlike ordinary images, geospatial imagery includes geographic metadata, where each pixel is tied to precise geo-coordinates. This enables annotators to work with spatial accuracy, ensuring annotations align with real-world locations.
- Multispectral Data
Geospatial images often go beyond the standard RGB format, including multiple spectral bands such as infrared, thermal, or others. These bands provide additional data, essential for tasks like vegetation analysis, water body detection, or urban planning.
- Support for Different Projections
Geospatial imagery is represented using various coordinate reference systems, often specified by EPSG codes. These projections affect how the Earth's curved surface is translated into a flat image, and annotation tools must be compatible with diverse projection systems.
The specificities of geospatial imagery demand purpose-built capabilities to ensure efficient and accurate annotation workflows.
Uploading Geospatial images
Our platform supports the seamless upload of geospatial data with the following specifications and options:
Supported File Types and Sizes
- File Formats: GeoTiff images, including
.tif,.jp2, and.ntffiles. - Maximum File Size: Up to 1 GB per file. For files larger than 30 MB, Kili preprocesses the image to generate tiles based on the specified zoom levels. These tiles are then used to optimize navigation in the labeling interface.
Multi-Band imagery Support
We support a variety of band configurations to accommodate different use cases: 1-band (gray), 2-band (gray + alpha), 3-band (RGB), and 4-band (RGB + alpha) configurations.
Multi-band image uploadIf you upload an asset with more bands than the ones mentioned here above, we will import the first 3 non-alpha bands as RGB bands. If you have files with more bands and if this behavior is not the one you expect, you will need to preprocess the image before uploading it, by selecting 1 (for grayscale) or 3 bands (for RGB) among all the bands to create a new image with these.
For this you can use the
gdal_translateutility from GDAL as follows:
gdal_translate -b $BAND_NUMBER input.tif output.tif(for 1 band)gdal_translate -b $BAND_NUMBER_1 -b $BAND_NUMBER_2 -b $BAND_NUMBER_3 input.tif output.tif(for 3 bands)
Supported Projection Systems
- EPSG4326 (WGS 84).
- EPSG3857 (Web Mercator).
Importing Geospatial Data
Via the Import Menu
- You can upload single-layer assets using the image's existing projection system.
Via the SDK
You can:
- Modify the image’s projection system: you can convert and upload images in either of the supported projections,
EPSG4326orEPSG3857. Ensure consistency between layers to maintain spatial accuracy. - Upload all layers using the same projection system to ensure alignment and compatibility. For more information, refer to Adding a multi-layer image.
- You can specify the
minZoomandmaxZoomvalues. The value range for both is 1-20 (level 1 being the lowest-detail: basically just an image of our planet, and level 20 being the maximum zoom for the asset).
TheminZoomparameter defines the zoom level that users are not allowed to zoom out from. ThemaxZoomvalue affects asset generation: the higher the value, the greater the level of details and the size of the asset. For example, if you setminZoomto 15 andmaxZoomto 20, the asset will be uploaded with the maximum level of details, will take longer to load and process, and will take up a lot of space. When opened, the example asset will show as zoomed in to a level sufficient to show specific city districts and won’t allow users to zoom out. - Add a base map: to provide geographical context, you can integrate a base map using any available tile server. Examples include Open Street Map and Google maps
For detailed instructions on SDK usage, refer to the tutorial here.
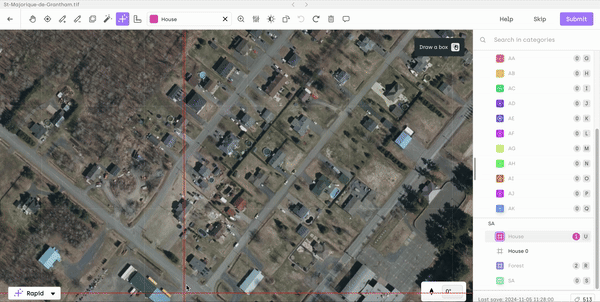
Annotating images
Our platform provides intuitive tools and features to facilitate efficient annotation of geospatial imagery.
Panning and zooming
Panning
Click and drag the image to move to a different area. As you pan, tiles will load dynamically to ensure smooth navigation and maintain high performance, even for large images.
Zooming
- Press
Space+ Draw a bounding box to zoom in on a specific area. - Adjust zoom levels directly from the header or by using the + and - keys
- Press
Shift+ 1 to go back to the initial zoom level
Rotating the image
You can use the rotation button to adjust the orientation of geospatial images. With each click, the image rotates by 10 degrees. Alternatively, you can enter the desired rotation angle directly into the input field for more precise adjustments. If you need to reset the rotation to its original orientation, simply double-click the rotation button.
Image rotation
Working with multiple layers
You can toggle layers, so you can visualize the same spot from different spectral views.This is useful in situations when you want to get the historical context of the same scene at different points in time or you need to visualize different spectral views, each one corresponding to a specific combination of the original image’s bands to annotate with extra accuracy. You can also use a slippy map (such as OpenStreetMap) as a base layer, for precise image location reference when making annotations.
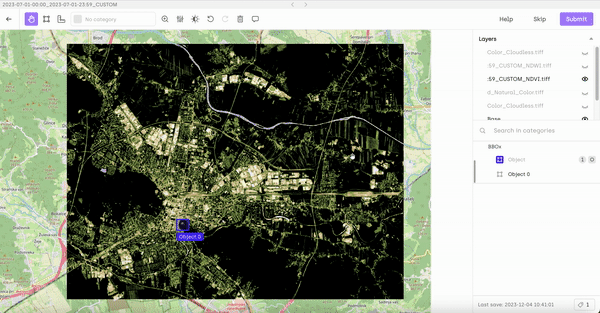
Toggling layers to annotate a multi-spectral image
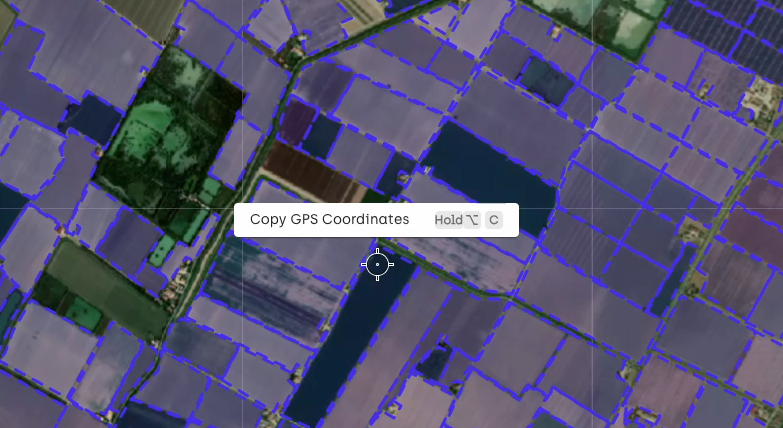
Copying Coordinates
You can quickly copy the geo coordinates of any point. To do that, hover over it, click the right mouse button, and then select Copy GPS Coordinates. Alternatively, use the Alt/Option + C keyboard shortcut. The coordinates are copied to clipboard.
Measuring Distances
You can measure distance between any two points. The distance is provided in meters and feet. This is helpful in situations when an object’s length is a decisive factor for assigning it a specific class.
Measuring the distance between points
Creating Annotations
Labeling geospatial images is not different from labeling standard images and you can use all the standard tools that you’d normally use with Image projects, including Interactive Segmentation with SAM2.
Creating Segmentation masks with SAM2
Exporting labels
When working with geospatial images, exported labels include the associated geo-coordinates, ensuring spatial accuracy and usability across geospatial applications.
Supported Export Formats
- Kili Format: A versatile format for integration with Kili workflows and further processing.
- GeoJSON Format: Widely used for geospatial data, compatible with various GIS tools and applications.
For detailed steps on how to export labels, refer to the export documentation here.
Exported Geographic coordinates
- In exported annotations,
xstands for longitude andyfor latitude.
Importing labels
Kili Format
Directly import labels saved in Kili format.
GeoJSON Labels
Convert GeoJSON labels into Kili format using our utility functions. You can find more information and the relevant code examples in the utils documentation. For a detailed guide on importing and converting labels, refer to this tutorial.
Updated 2 months ago