Using pose estimation
Pose estimation annotation is about detecting the position and orientation of an object.
For pose estimation, you can set up categories and pose points. You can decide if each point of the pose list is mandatory or optional (by default, pose points are not mandatory). Additionally, you can add nested jobs at each pose point.
Before you start labeling, make sure that you configured your interface correctly. Refer to Customizing project interface.
Annotating pose estimation points
When you place a point on the image, this will automatically trigger the selection of the next point in the pose list of the selected category. This helps you annotate faster, saving you the time to select the next point.
Additionally, when you finish placing the last point of the pose, the first point of the same category will be automatically selected. When you place it on the image, a new annotation will begin.
You can skip a non-mandatory point using Shift + right arrow.
Using labeling shortcuts speeds up your work. To access the full list of labeling shortcuts:
- Press Alt/Option + S
- Click on the shortcut icon.
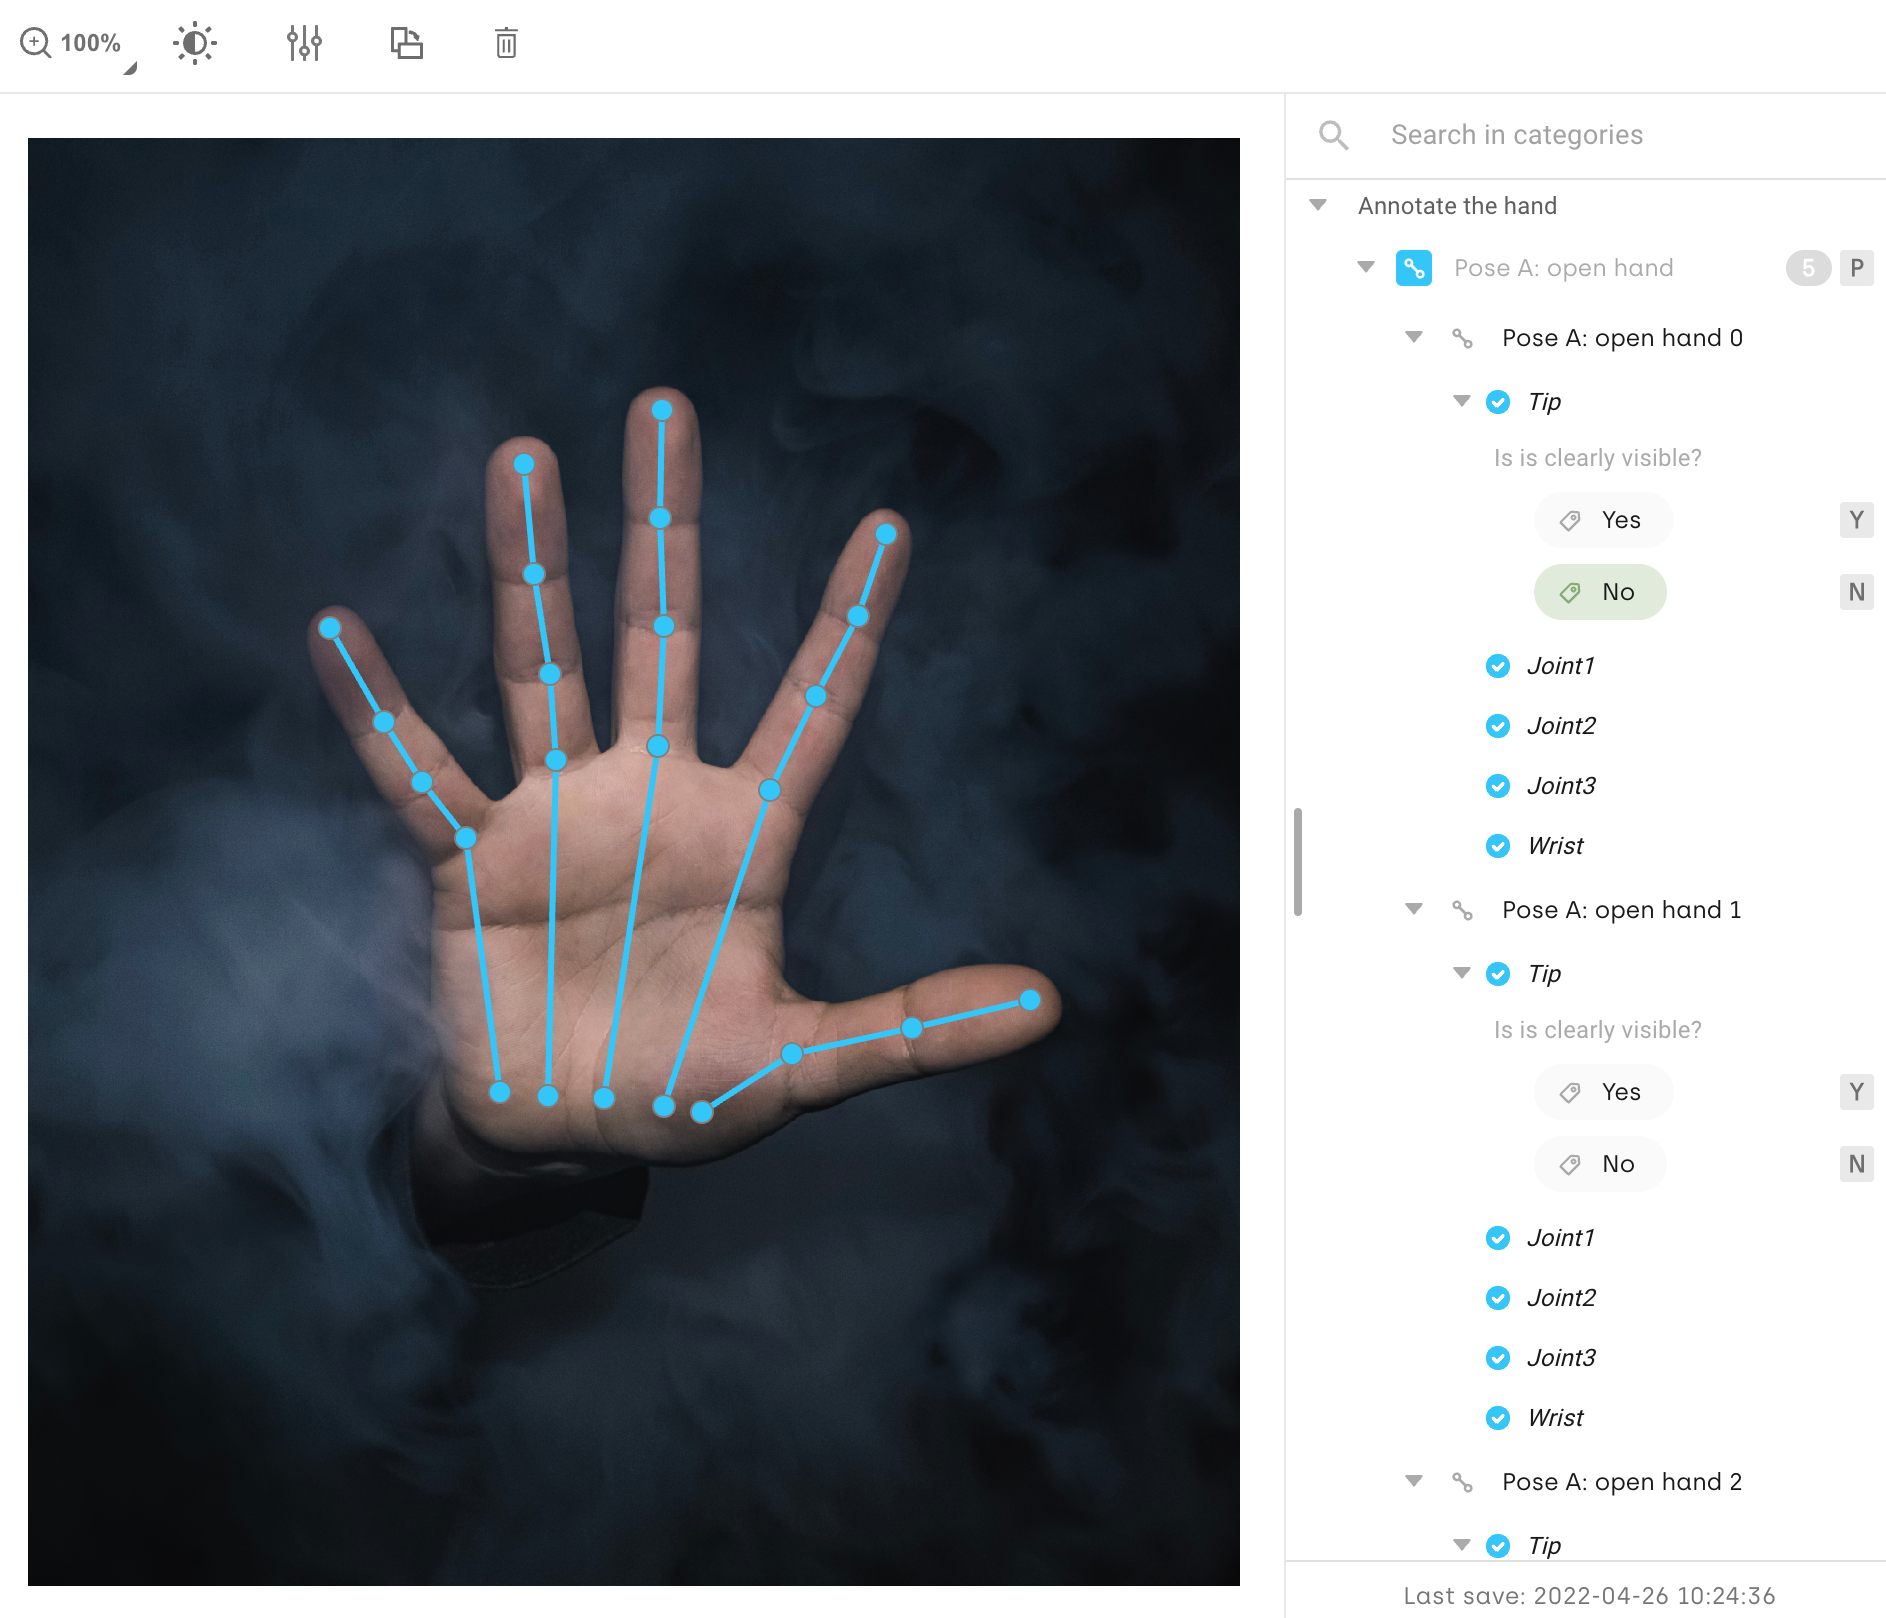
Pose estimation interface example
Pose estimation labeling interface:

In the example pose estimation labeling interface there is one category: 'Pose A: open hand', five points: 'Tip', 'Joint1', 'Joint2', 'Joint3' and 'Wrist', and one classification job at 'Tip' point level.
Updated 3 months ago