
Creating an Azure Blob Storage integration
To use remote files in projects, you must first create an integration. Then in each one of your projects, you can define a connector between the integration and the project.
- Only organization admins can manage remote integrations.* Azure supports multiple data storage technologies. This integration uses Blob Storage only.
To create an Azure Blob Storage integration:
- Click on your name in the top-right corner of the Kili app interface, and then go to Organization Management > Integrations.
- Click New.
- Select
Microsoft Azure - Blob Storage. (Azure Data Lake is not supported) - Configure CORS
- Pick one of the two ways to create an integration from Kili to Azure Blob Storage:
Configure CORS
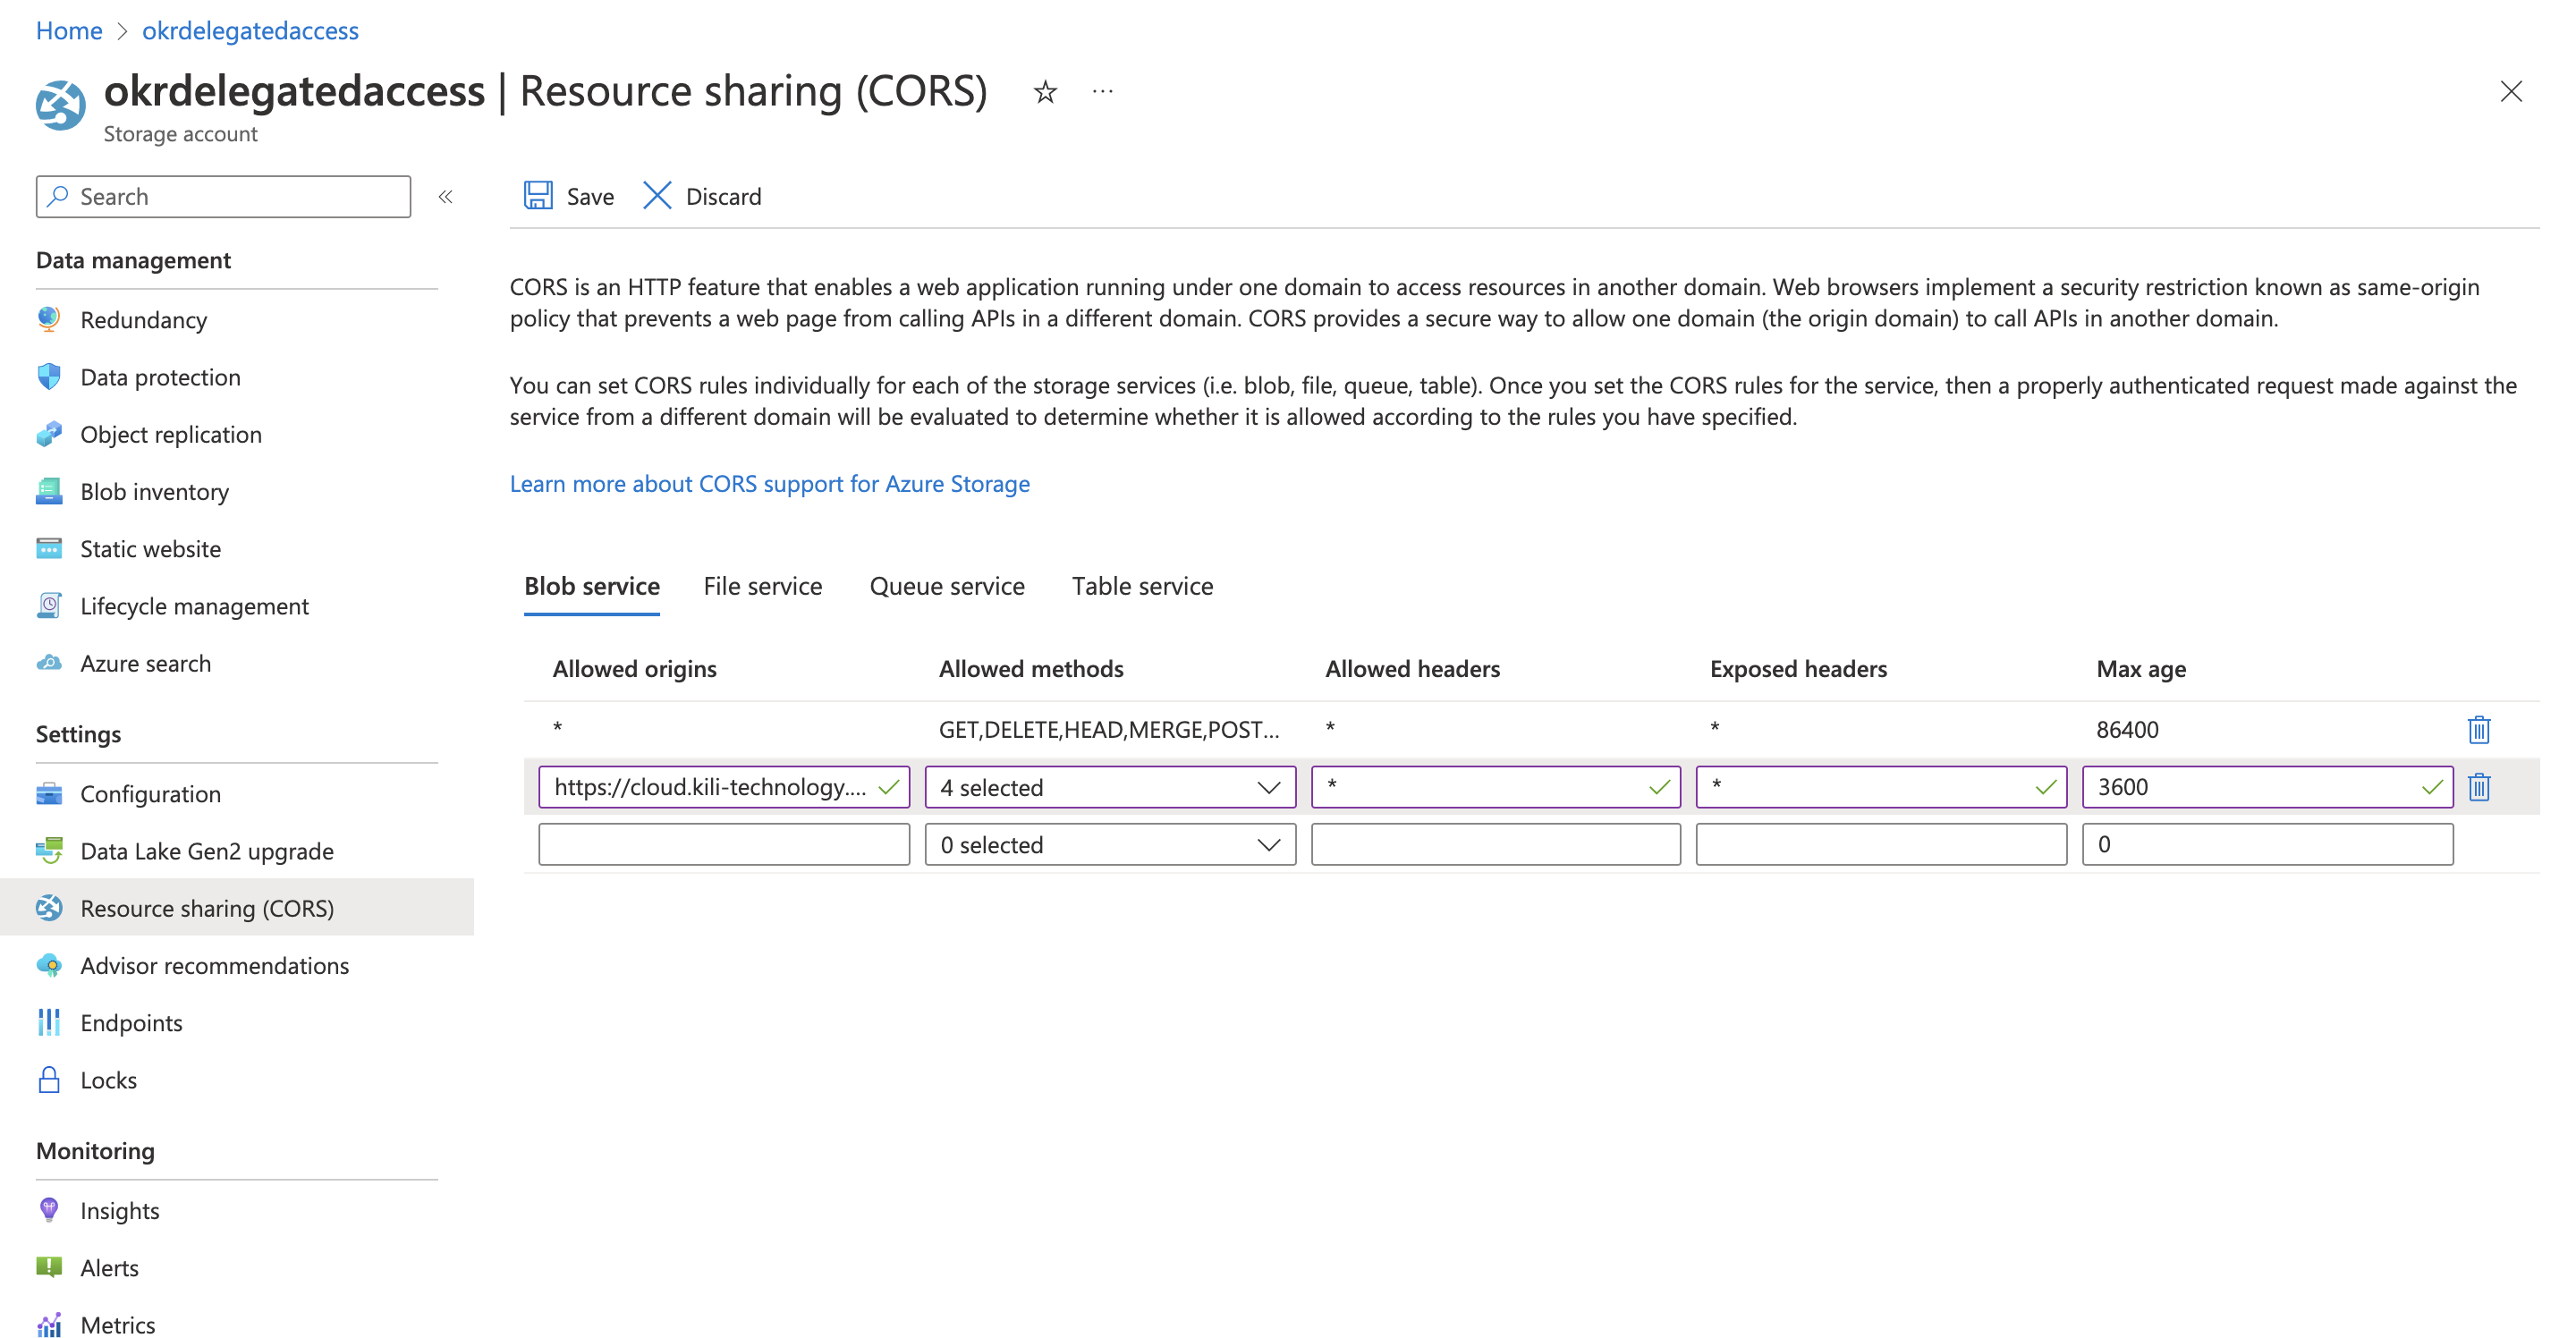
Add an entry to your storage account CORS rules, to allow Kili to directly read the signed urls in your bucket (refer to the example screenshot).
The allowed origin is https://cloud.kili-technology.com or https://cloud.eastus.kili-technology.com if using our US located platform) and the allowed methods are GET, HEAD, OPTIONS and PATCH.
Creating an integration with a service account
- Before you perform any steps in this procedure, prepare your Azure tenant ID. You can get your tenant ID from the Overview page of your Azure Active Directory.* If you previously connected Kili to one of your Azure accounts, you can select the existing ID, click on Use this tenant Id, click Save, and skip the rest of the steps.
- If this is your first time connecting Kili to your tenant: paste your Tenant ID and click on Allow Kili's Tenant. You are redirected to your Azure portal.
- Confirm adding Kili to your tenant. You will be redirected to the integration setup.
- Fill in the following:
- Name: name of the integration that you are creating
- Azure Storage Url: paste your storage container URL.
It looks like this:
https://<STORAGE ACCOUNT>.blob.core.windows.net/<CONTAINER NAME>- Click Save. The app will automatically trigger a connection test.
If the test fails, this means that the storage account wasn't configured to work with Kili. For information on how to fix this issue, refer to the Granting permissions and setting CORS for your storage container section.
Granting permissions and setting CORS for your storage container
To grant permissions for your storage container:
- Add Kili’s service principal as a Storage Blob Delegator in the storage account, and Storage Blob Data Reader in the container. Otherwise the Kili app has no access to it.
- Add an entry to your storage account CORS rules, to allow Kili to directly read the signed urls in your bucket (refer to the example screenshot). The allowed origin is
https://cloud.kili-technology.comorhttps://cloud.eastus.kili-technology.comif using our US located platform) and the allowed methods areGET,HEAD,OPTIONSandPATCH.
You are now ready to synchronize data with a project.
Creating an integration with credentials
This is not a recommended setup. If you create an integration with credentials, each project user will have access to Azure storage directly from Kili's front-end. Use it only if your Azure storage is not accessible from Kili's backend.
Smart tools like interactive segmentation are not supported in this mode.
Setting up the integration in Kili
- Fill in the following:
- Name: name of the integration that you are creating
- Azure SAS Token: the shared access token of the container. You can get it on the Shared Access Tokens page of your container. Under Permissions, select both
READandLIST. - Azure Storage Url: Paste the URL of your storage container that has this pattern
https://<STORAGE ACCOUNT>.blob.core.windows.net/<CONTAINER NAME>
You can save the unfinished configuration even if the connection check fails. This means that you can finish this configuration later without losing any of the data that you entered so far.
You are now ready to synchronize data with a project.
Updated 9 months ago