
Setting up a Geospatial project
Create a new project
From the project creation page, select Geospatial as the project type. This ensures your project is configured to support large image assets, multi-band data, and geospatial labeling tools.
Configure your interface, team, and workflow
Add the necessary project members and assign them appropriate roles (e.g., labelers, reviewers, managers). Then, set up your labeling workflow according to your quality and collaboration requirements.
(You can refer to Customize your interface, Managing Project Members and Quality Workflow Setup for more details.)
Configure your layers
From your project settings, open the Layers menu and click Add from URL.
Enter the URL of your XYZ base map or WMS/WMTS server, then select the desired layer.
You can adjust the parameters if needed — and your new layer will be available in the labeling interface, where users can show, hide, or reorder it as they work.

Disclaimer: Make sure that your use of the selected provider complies with their licensing terms.
Image Rendering Settings
Also accessible from the Layers menu, the Image Rendering section lets project admins configure two project-level settings that control how geospatial images are displayed and edited across the project.
Coordinate Reference System (CRS)
The CRS setting defines the reference coordinate system used for all label editing operations in the project. Labelers work in this CRS when drawing or modifying annotations.
In the labeling interface, users can switch to a different CRS for visualization purposes — but the interface will enter read-only mode in that case, preventing any editing until the reference CRS is restored.
Note: Once the first annotation has been created on an asset, its reference CRS is locked for its entire lifecycle — including review steps. Changing the project-level CRS only affects assets on which labeling has not yet started.
Resampling Method
The resampling method controls the algorithm used to render image pixels when the image is zoomed in. This setting has no effect on the image overview — it only applies when a labeler is working at a zoomed-in level.
Available methods are Nearest Neighbor, Bilinear, Cubic, and Average. See Image resampling methods for a detailed explanation of each option and guidance on when to use them.
Note: When a base map is enabled for the project, the CRS is automatically set to EPSG:3857.
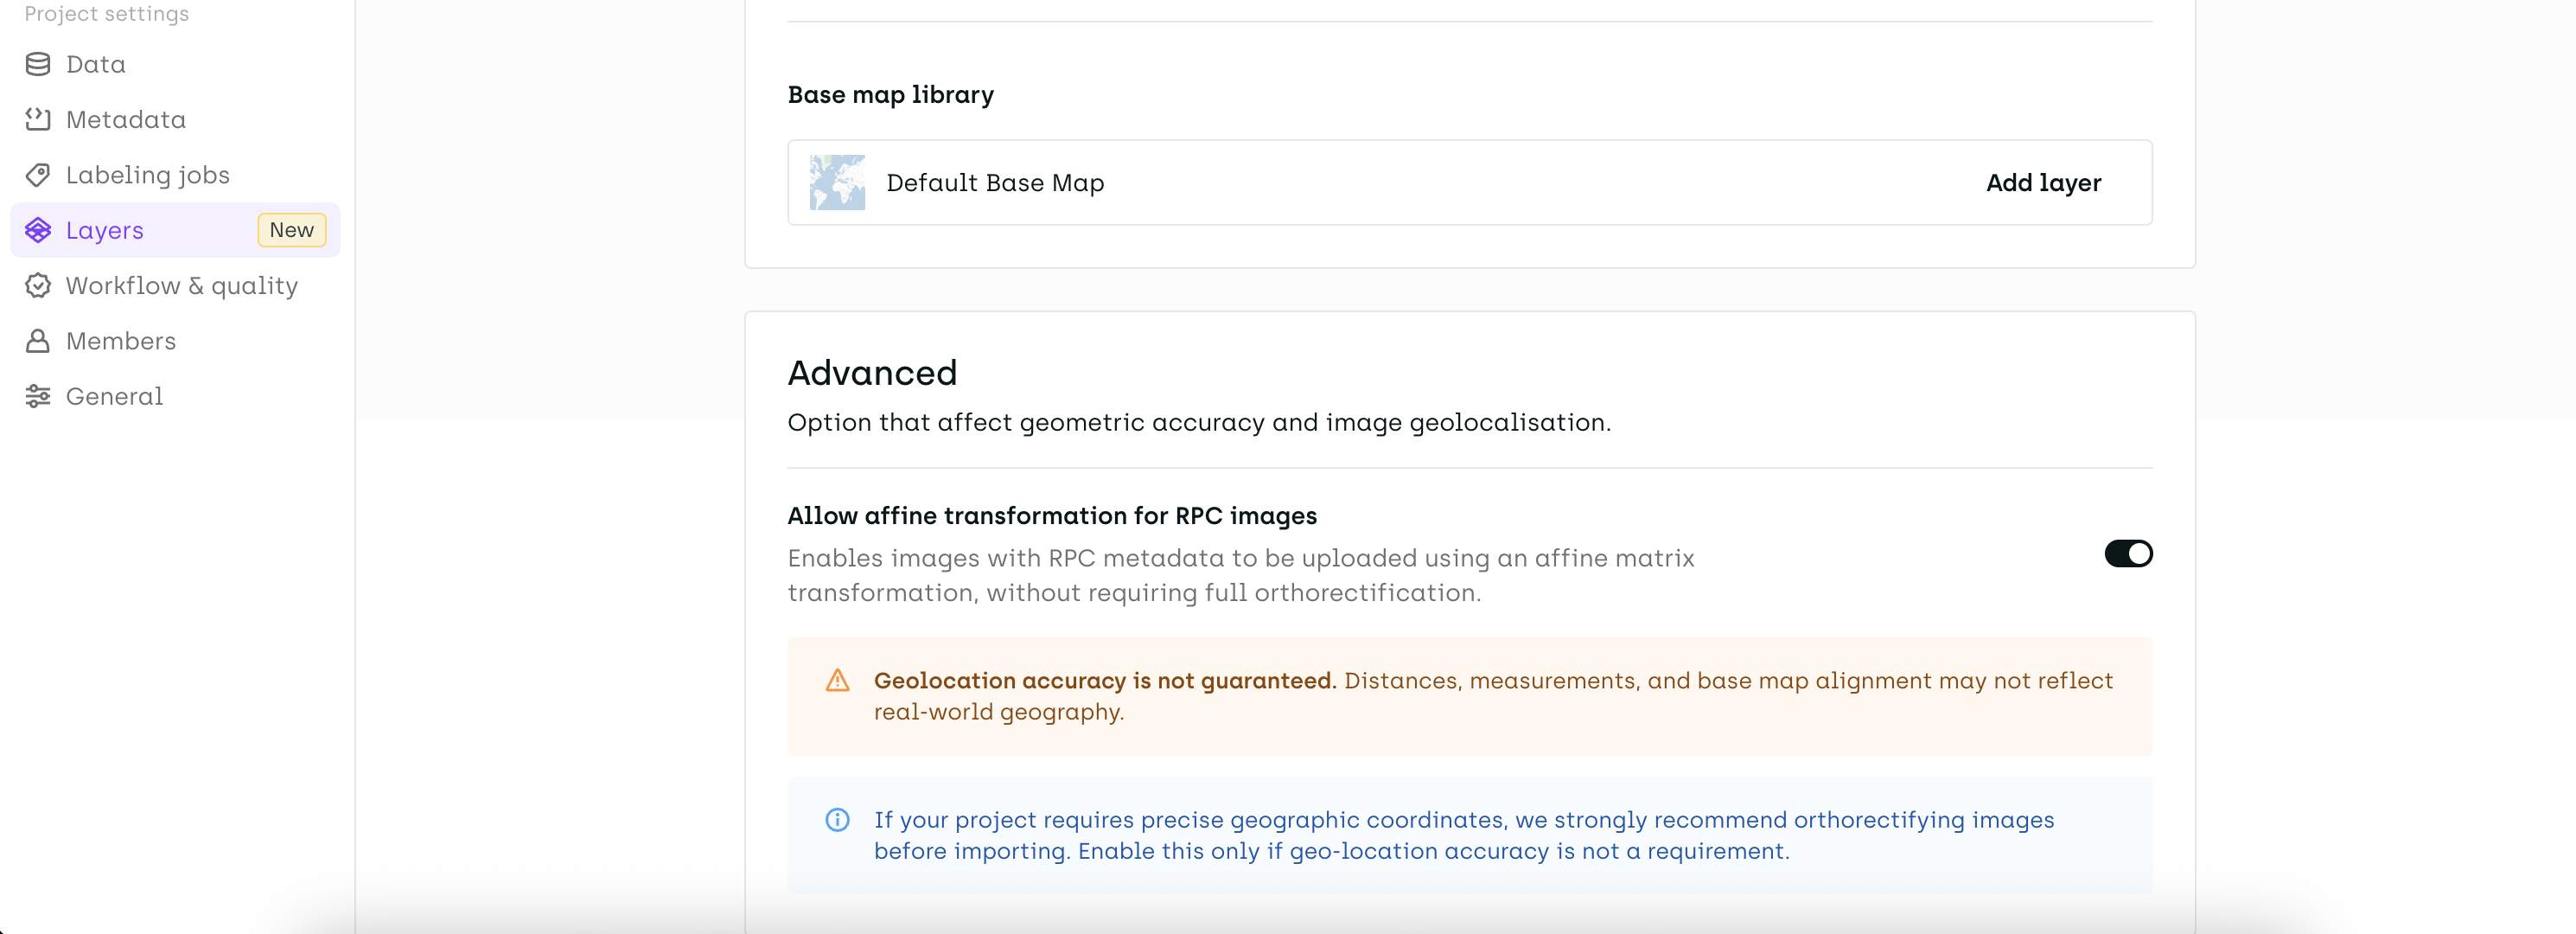
Advanced: Affine Transformation for RPC Images
By default, assets with RPC (Rational Polynomial Coefficients) metadata are rejected at import with an explicit error message, as RPC-based positioning cannot be guaranteed to meet geo-location accuracy standards.
If your workflow requires importing RPC images regardless, project admins can enable an opt-in setting that allows these assets to be processed using an Affine matrix transformation instead. This setting is available in the Project Settings and is off by default. Enabling it will display a warning to make the accuracy trade-off explicit.
Note: Affine transformation does not guarantee geo-location accuracy for RPC images. Enable this setting only if you are aware of the limitations and your use case does not require precise geographic positioning.
Updated 2 months ago