
Creating an AWS S3 integration
To use remote files in projects, you must first create an integration. Then in each one of your projects, you can define a connector between the integration and the project.
Only organization admins can manage remote integrations.
Creating the integration in Kili
-
In Kili, click on your name in the top-right corner of the Kili app interface, and then go to Organization Management > Integrations.
-
Click New.
-
Select
AWS - S3. -
Provide your Role external id:
- If you are creating an AWS integration for the first time, then select the newly-generated identifier (marked as
New). - If you created an AWS integration before, you can select an existing identifier to avoid creation of new role in your AWS IAM.
- If you are creating an AWS integration for the first time, then select the newly-generated identifier (marked as
-
If you already created the S3 access point on AWS, then you can paste its ARN in the Access point ARN field. Otherwise you can fill it with this placeholder:
arn:aws:s3:region:000000000000:accesspoint/placeholder, and replace it later with the real value. -
If you already created the role in AWS to let Kili get access to your buckets, then you can paste its ARN in the Role ARN field. Otherwise you can fill it with this placeholder:
arn:aws:iam::000000000000:role/placeholder, and replace it later with the real value. -
[optional] Tick the I authorize Kili Technology to process my files on its servers to enable features that require such processing checkbox.
AWS setup
S3 Bucket and Access Point
- Go to your S3 Bucket, and in Permissions set the CORS. This way, Kili front-end will be able to fetch files. Here is the policy to add:
 [
    {
        "AllowedHeaders": [
            "*"
        ],
        "AllowedMethods": [
            "GET"
        ],
        "AllowedOrigins": [
            "https://cloud.kili-technology.com"
        ],
        "ExposeHeaders": []
    }
]
[
{
"AllowedHeaders": [
"*"
],
"AllowedMethods": [
"GET"
],
"AllowedOrigins": [
"https://cloud.eastus.kili-technology.com"
],
"ExposeHeaders": []
}
]- Create an access point for Kili in your S3 bucket. Refer to Creating access points.
Enable Internet access but block public access.
IAM
- Create a Policy to give rights on the access point and the bucket. Refer to this example json file with a policy summary for a bucket named
my-bucketwith an access point namedkili-access-pointwhose ARN isarn:aws:s3:eu-west-3:999888496268:accesspoint/my-access-point-name:
{
    "Version": "2012-10-17",
    "Statement": [
        {
            "Sid": "VisualEditor0",
            "Effect": "Allow",
            "Action": [
                "s3:ListBucket",
                "s3:GetObject"
            ],
            "Resource": [
                "arn:aws:s3:::my-bucket",
              	"arn:aws:s3:::my-bucket/*",
                "arn:aws:s3:region:000000000000:accesspoint/kili-access-point-name",
              	"arn:aws:s3:region:000000000000:accesspoint/kili-access-point-name/*"
            ]
        }
    ]
}- Create a Role or alternatively attach newly created policy to an existing one.
- Make sure to select
AWS accountas entity type and tick theRequire external IDcheckbox. - Paste the role external id created previously in the Kili integration
- Make sure to select
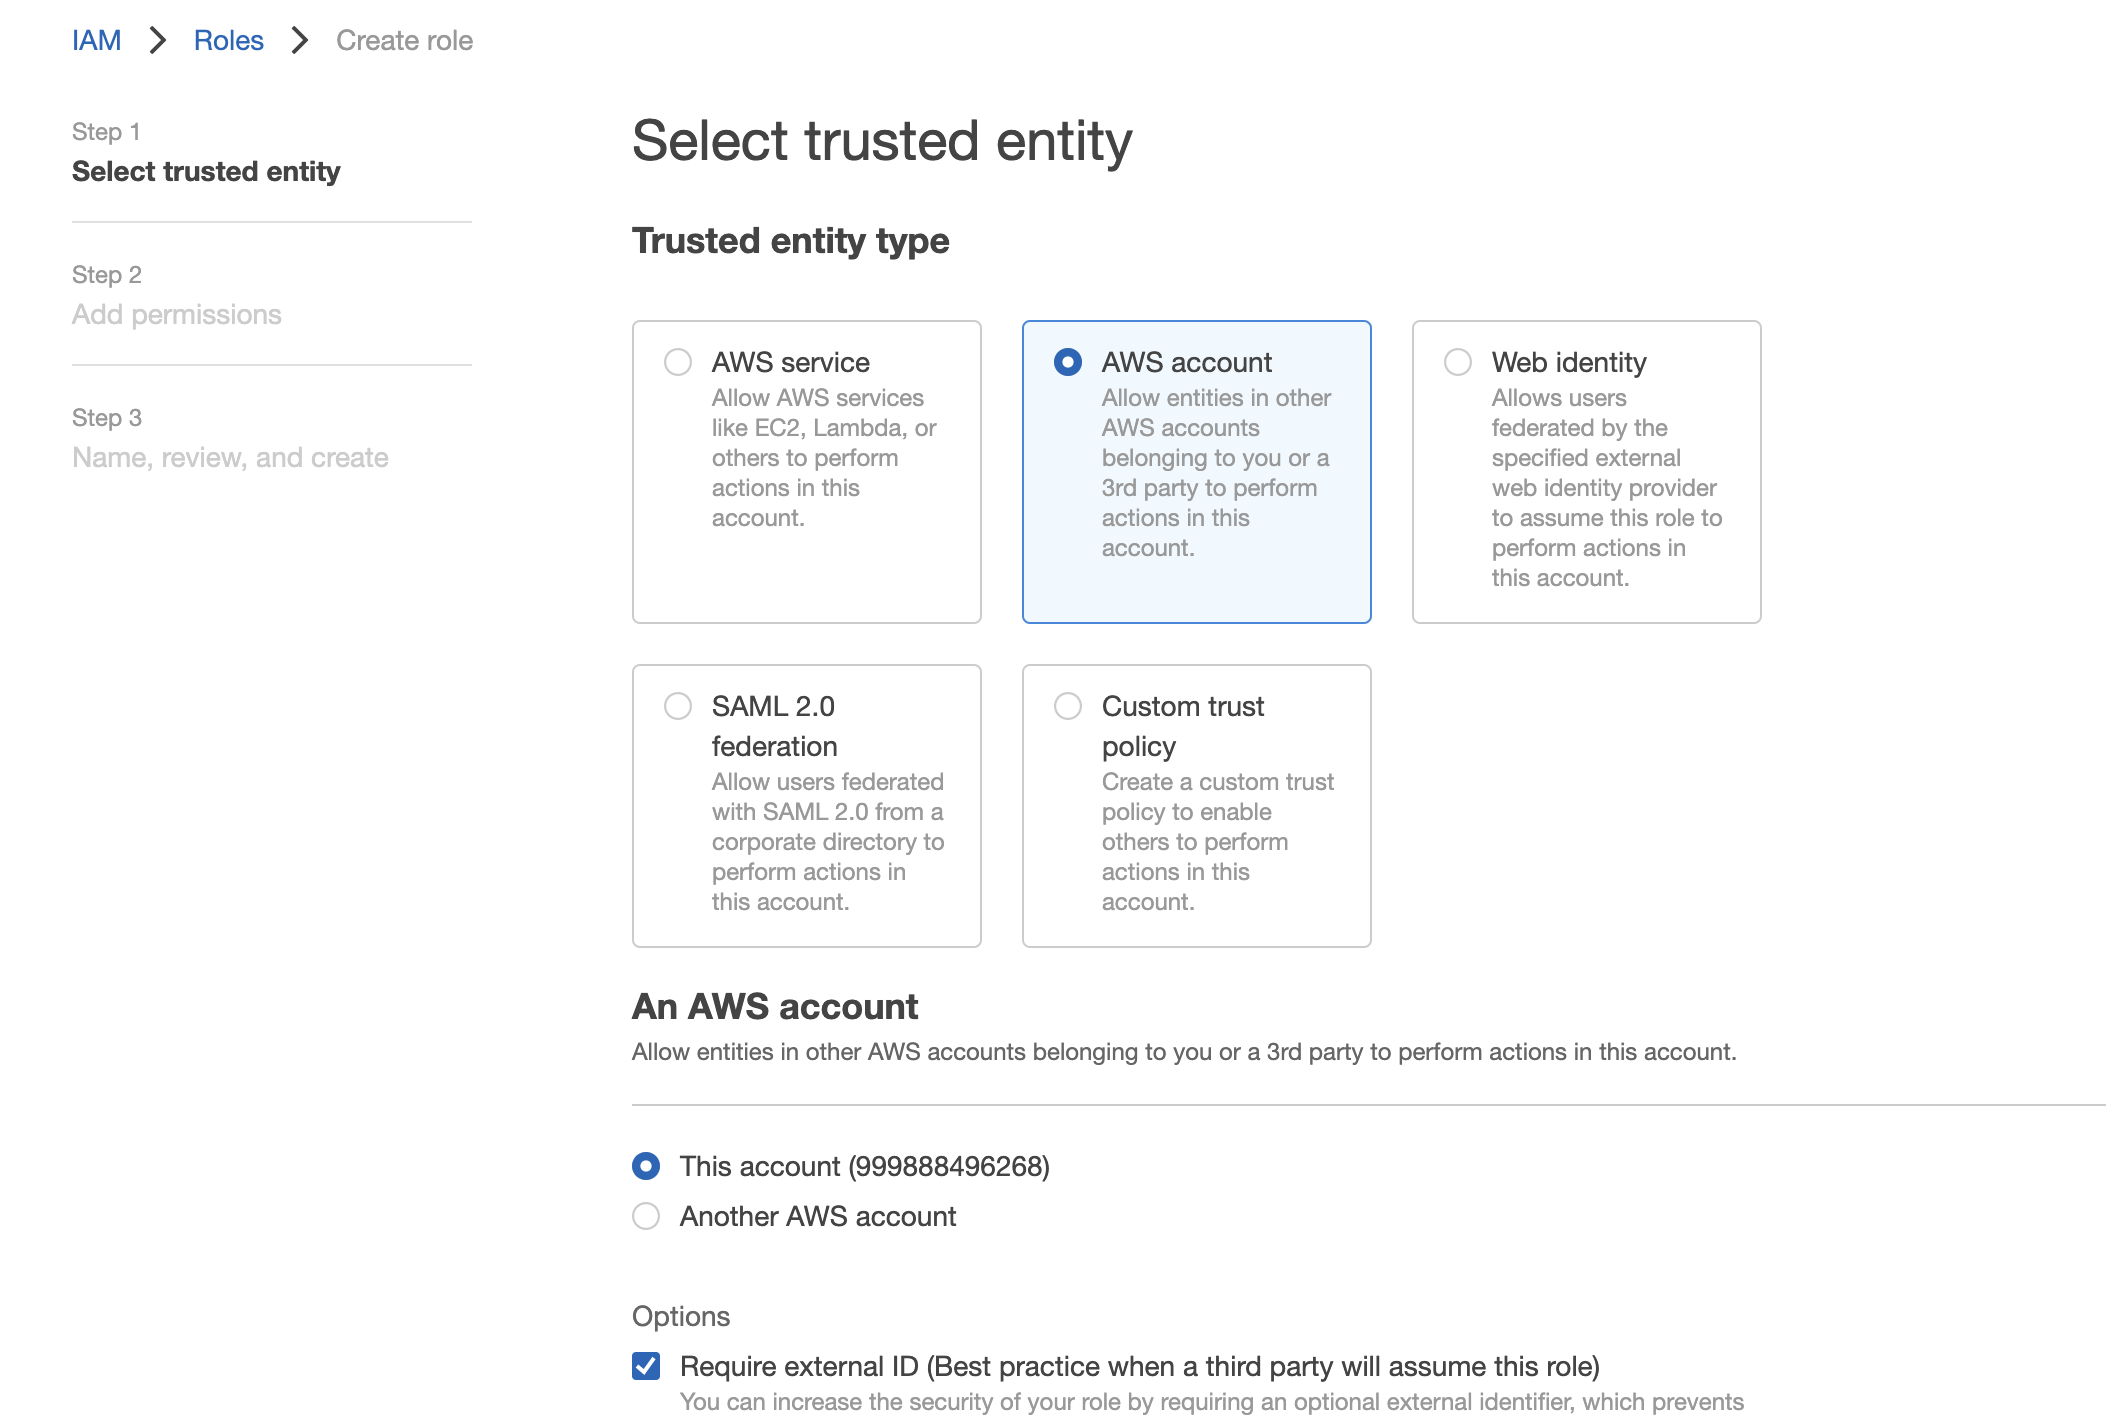
The account "999888496268" indicated above is used as an example. You should rather click on "Another AWS account" and use this one :arn:aws:iam::999888496268:root.
The selected trusted entities should look like this:
{
    "Version": "2012-10-17",
    "Statement": [
        {
            "Effect": "Allow",
            "Action": "sts:AssumeRole",
            "Principal": {
                "AWS": "arn:aws:iam::999888496268:root"
            },
            "Condition": {
                "StringEquals": {
                    "sts:ExternalId": "<ROLE EXTERNAL ID>"
                }
            }
        }
    ]
}
Replace <ROLE EXTERNAL ID> by the role external ID created for the integration in Kili.
You are now ready to synchronize data with a project.
AWS limitations and tips
- When dealing with multiple AWS integrations in Kili, you can make AWS IAM admin tasks easier by:
- reusing a common role (and so using a unique role external id)
- updating a common policy to list all buckets used in Kili
If more than 1,000 folders exist in the same directory, Kili won't be able to list them all.
Updated 9 months ago